:)

:)

Saturday, December 28, 2013

Sweet and Sour Chicken

This is a family recipe and it's the best that I've ever had. I may be just a little biased :)

Anyway we made it for dinner tonight and so I thought I would share it with all you lovely people!
I also realized when I was uploading the pictures that I may have gotten a little camera happy... (ahem, 25 photos!). I got a new camera for Christmas and I just couldn't help it!

Ingredients you'll need:
1 6 oz can pineapple juice
1/4 cup white wine vinegar
soy sauce
1/4 cup brown sugar
2 tablespoons cornstarch
1 tablespoon soy sauce
1/2 clove garlic minced or chopped
2-3 boneless skinless chicken breasts

We started with frozen chicken, so we just through that into a greased pan and started cooking that while we heated the chicken broth for the rice (did I mention that it goes great with rice? ;) ) and assembled the sauce.

For the chicken:
Step one, either start cooking whole chicken or dice them into bite sized cubes. We cooked ours a little to thaw it and then diced it about halfway through. You use the garlic in this step, just saute it along with the chicken. My little sis may or may not have completely forgotten about the garlic. It was still delicious though!
Our completely frozen chicken. We may or may not have realized when we tried to flip them that we forgot to spray the pan. So we did it after we pried them up :)
Step 2: Add enough soy sauce to cover the bottom of the pan and coat the chicken

For the sauce:
Mix all your ingredients together in a pan OFF of the heat. 
Especially make sure that the cornstarch is completely dissolved before you put it on the stove.
Then stir constantly on medium heat until it changes color.
It's kind of subtle, so make sure you're looking for it. It will thicken up too. If you find that the sauce is a little thinner than you like it, take some water and mix it with cornstarch. Make sure it is completely dissolved again (warm water is best) and then add it to your sauce and stir it in.

For the rice:
We did one cup of rice and one two cup can of Chicken broth. You don't really need to use broth, but I find that if you've got 'cheaper' rice then it makes it taste a LOT better.
Cook the rice until tender. If you're using Mahamati rice like us, then it takes about 20 minutes :)


Mix your sauce and chicken/soy sauce mixture.

Then mix it together!

Then you're all done! You can mix it with the rice, or just have them separate!
Let me know if it turns out for you, or if any of the steps are unclear! :)

Thursday, December 26, 2013

The 25 Days of Christ

The 25 Days of Christ: Has a scripture and a link to a picture and video for every day in December.
This year I decided to do the 25 days of Christ. I only found it a month or so before December started... and then completely forgot about it. The beginning of December was CRAZY busy for me. Once it finally calmed down and a remembered that Christmas was coming I was already a week into the month!

But, I decided that this was something that I didn't want to wait on till next year. So instead I started on day 1 and did two days worth every day until I caught up (well mostly, except for the day that I got sick...). I must say, it was amazing. The scriptures listed take you from his birth, to death and resurrection. It was a beautiful way to look at his life rather than just looking at his birth.

Though I must give this caveat, instead of getting me into the Christmas season, it made me forget all about it. I didn't care as much that Christmas was coming and I never did get that kind of Christmas wonder this year. What I did gain was a greater appreciation for my Savior and it helped me focus a little more on the lives of those around me.

If you did it this year too, let me know! And be sure to keep it in mind for the next Christmas season, or any month really where you want to feel a little closer to Christ. :) You could even do it leading up to Easter since it does cover his resurrection.

Wednesday, December 25, 2013

Polar Express Hot Chocolate


Polar express hot chocolate Recipe

Pretty much all of our Christmas Eve traditions have gone down the drain since my brother got married. So I figured it was time to start some new ones. What could be better than hot chocolate on Christmas Eve?

So I tried the Polar Express Hot Chocolate, and it was AMAZING!
The only thing that we had to get from the store was the whipping cream.
 2 cups chocolate chips, teaspoon vanilla
 6 cups milk
Cup and half whipped cream, and a can sweetened condensed milk
Mix it all together, stirring forever (like 30 minutes)
We put the mixed chocolate milk in a crock pot on low to keep it warm and even the family members who said that they didn't want any had to have a cup after they tasted it!

Try it out! :)

Friday, December 20, 2013

Snowflake Giftwrap + Wrapping paper heart envelopes

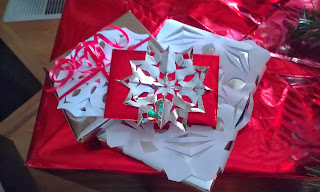
I don't know about you guys, but I kind of love wrapping presents. I'm not sure why. Maybe it's the way that everything gets tucked in and it looks so pretty. In any case, I thought I'd spice up my wrapping this year! So I decided to make some snowflakes, like this picture


Original pin

Had I actually read the original pin, I would have known that you can iron your flakes without steam to make them flat...
Oh well, this is how they turned out :)


The best flakes were out of wrapping paper, I would definitely recommend using different ones :)

I would also recommend doing it on a table to avoid this
It was like confetti everywhere.

I also made heart envelopes out of wrapping paper for my gift cards using this pin
How to: <3 Envelope

Super simple and then they're wrapped festively too :)

Good luck wrapping!

Thursday, December 19, 2013

Nutella Hot Chocolate

I came home from work today, having trudged through mounds of snow, and I knew that it was definitely hot chocolate time :) I've been joking with my family for weeks about how we need to start having hot chocolate Tuesdays or something so that we can get through all the hot chocolate recipes that I've found.

two scoops nutella + one cup milk = best hot cocoa ever. Smart idea.
Sadly the recipe is pretty vague "2 scoops nutella+ 1 cup milk"

Ha ha and I wish that I could tell you I'm going to be more specific, but actually, I just added nutella until it tastes chocolatey enough, because I don't know about you, but I have no idea how big a scoop is.


Anyway, it ended up turning out pretty well! And bonus, you don't have to go to the store to get ingredients like heavy whipping cream (which on a day like today could be pretty treacherous).

I will say that the flavor was milder than I expected, so if you're not a huge chocolate fan, I would definitely recommend it!

Wednesday, December 18, 2013

The Rapunzel Braid Tutorial

I don't really remember how the Rapunzel braid got started. I think I was just messing around. It was definitely after we did the Warrior braid, but after a while I got sick of calling it the 'tri-braid'. It didn't seem like a cool name. Then it occurred to me that it kind of looked like Rapunzel's braid in Tangled! So here it is!

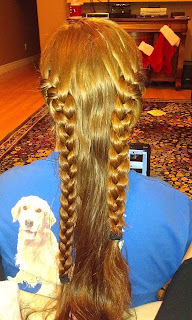
This is the finished product :)

What you'll need:
3 Hair ties

That's pretty much it!

Step one: Start french braid, just like you would would be french braiding your bangs
We like to use a side part, but you don't necessarily have to.

Step 2: Start adding in other hair once you get across your forehead.
Step 3: Stop taking more hair once you reach your neck taking hair from your top layers until you're about to the center of the back of your head then braid it all the way down.. Then tie it off.
Step 4: Start a french braid on the other side of your head, once again taking hair until you reach your neck, then braid it the rest of the way down.
Then you should have two braids just like this.
Step 5: Braid the remaining hair normally. I've tried this a bunch of different ways. I've tried french braiding it a little, but for me, just the regular braid works best.
Step 6: This may seem weird, but I've tried the order of the braids a bunch of different ways too, seeing which one is best on top, left over right and then the last braid you did coming up from the middle works the best so that the braids aren't sticking off each other.
Step 7: Braid it down like a normal braid.
Step 8: I take out the hair ties as I come to them when I'm braiding down. Usually one strand is done long before the other two and you can just braid it down as far as the layers allow.

You're all finished! :)

Also, if it's wet (which is easier) then when you take it out you get these beautiful waves :)

The longer you leave the braid, the tighter the waves. It even works on my little sister's super thick, refuse to scrunch hair.

Monday, December 9, 2013

French Toast Roll Ups and Crepe Sauce

Every morning I wake up and think, what should I have for breakfast today? I always try and think of something awesome, because days are always better when they start deliciously. So this morning I decided it was the morning to make French toast roll ups! Plus, I've been meaning to make a pin about our family Crepe sauce, bonus!

First off, I want to say that these were delicious! And pretty easy!
This is the original pin


Here's how I did it!
All the ingredients for the roll ups
Family recipe for French Dip batter is an egg, milk and vanilla :)
When you're rolling out your bread I found that it worked best if you rolled both directions, so that the edges got nice and flat for rolling
Sadly we had no berries, so we just did nutella and the crepe sauce
I totally forgot to take pictures of them cooking and being rolled in the sugar, but I used tongs, and I would definitely recommend them :)
This is the finished product!
We just drizzled the crepe sauce on top on the first ones and then put in inside for the second round

And now... for the crepe sauce!
Super simple! All you need is a block of cream cheese and a can of sweetened condensed milk
Put them together and blend till smooth!
It makes quite a bit! Even if you have a crepe party you may find that you have a fair amount left over. So what we did is we used as much as we wanted on our French Toast and then froze the rest in baggies!
Enjoy! Let me know how yours turn out!